How to Make Perfect Peppermint Bark Brownies: Your Ultimate Guide
As the holiday season draws near, few treats capture the festive spirit quite like the marriage of rich, fudgy brownies and crisp, refreshing peppermint bark. These irresistible squares are more than just a dessert; they're a celebration in every bite, blending the deep comfort of chocolate with the cool, invigorating zest of peppermint. If you've been searching for the ultimate peppermint bark brownies recipe that promises both decadence and ease, you've come to the right place. This comprehensive guide will walk you through every step, ensuring your homemade creation is nothing short of perfection.
Why Peppermint Bark Brownies Are a Holiday Must-Have
There's an undeniable magic that happens when you combine two beloved desserts into one show-stopping treat. Peppermint bark brownies stand out for several compelling reasons:
- Irresistible Flavor Combination: The deep, dark chocolate of a rich brownie provides the perfect canvas for the bright, minty crunch of peppermint bark. It's a symphony of sweet and cool, satisfying every palate.
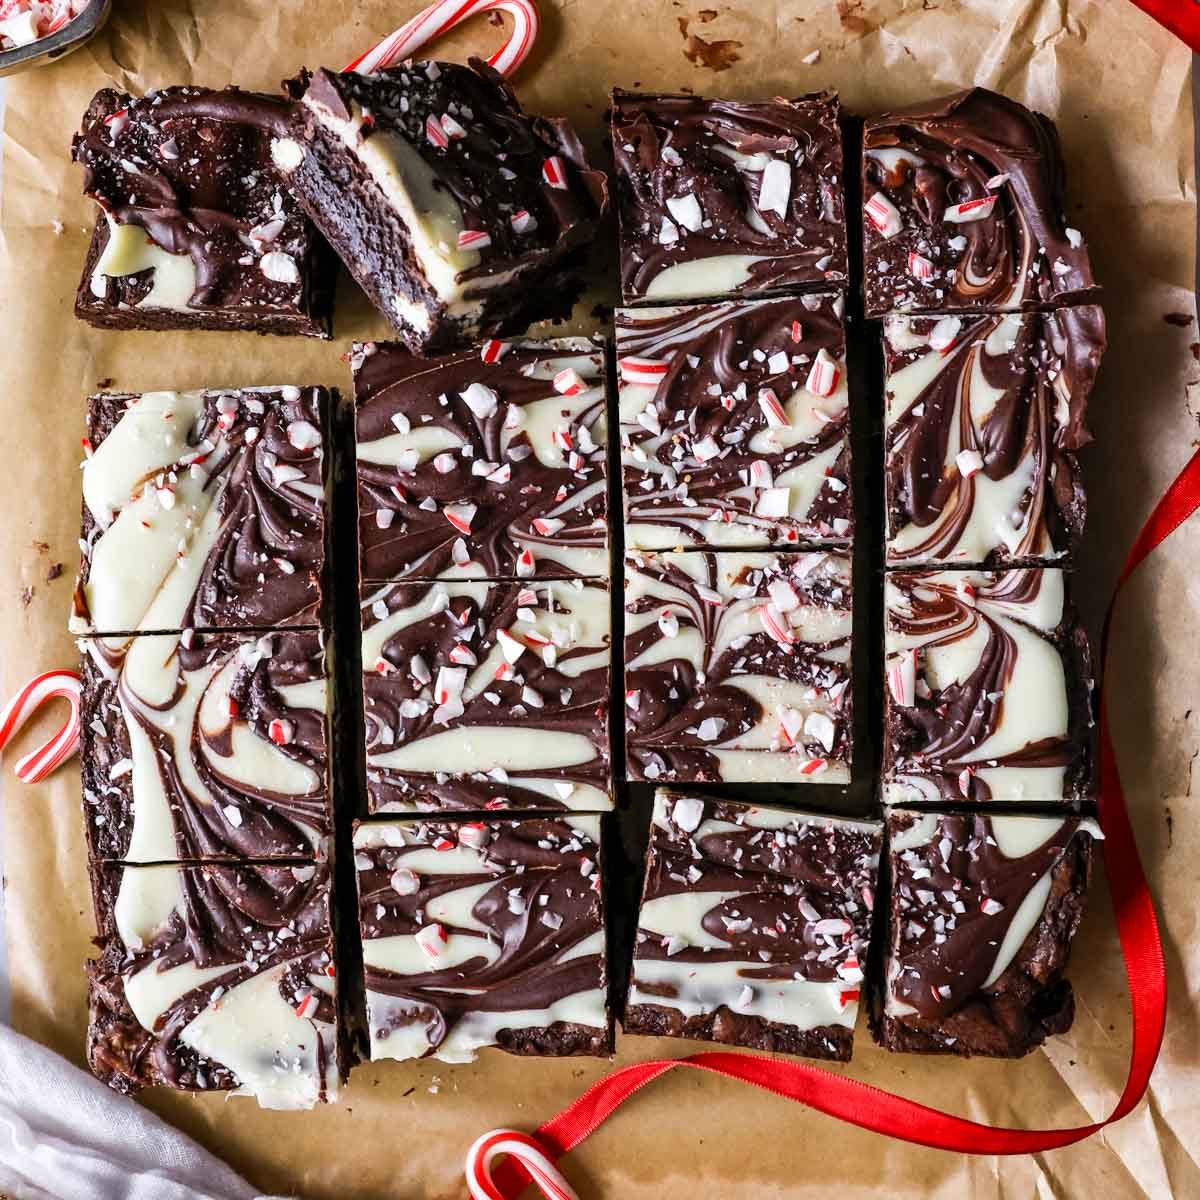
- Festive Appearance: Dusted with crushed red and white candy canes, these brownies are visually stunning, making them a perfect addition to any holiday dessert table, potluck, or cookie exchange.
- Versatility: While undeniably a holiday staple, the core peppermint bark brownies recipe can be adapted for any occasion, simply by adjusting the type of candy or chocolate used for the topping.
- Homemade Charm: Offering homemade treats is a special way to show you care. These brownies, despite their impressive look, are surprisingly straightforward to make, allowing you to share a piece of your heart with friends and family.
Whether you're a seasoned baker or a curious beginner, mastering this festive delight will earn you rave reviews and solidify your status as a holiday baking hero. Let's dive into the delicious details.
Mastering the Ultimate Peppermint Bark Brownies Recipe: Ingredients & Prep
The secret to perfect peppermint bark brownies lies in understanding each component and choosing quality ingredients. Think of it as building a culinary masterpiece, layer by layer.
The Brownie Base: Fudgy vs. Cakey
The foundation of your peppermint bark brownies is, of course, the brownie itself. Do you prefer a dense, fudgy brownie that melts in your mouth, or a lighter, cakey texture? Our ultimate peppermint bark brownies recipe leans towards the fudgy side, offering a satisfying chew that contrasts beautifully with the crisp bark.
- For Fudgy Brownies: Focus on a higher fat-to-flour ratio, often incorporating melted butter and high-quality chocolate or cocoa powder. Avoid overmixing, as this can develop the gluten too much, leading to a tougher, cakier texture. Eggs also contribute to chewiness and richness.
- Key Ingredients:
- Unsalted Butter: For rich flavor and moistness.
- Granulated Sugar & Brown Sugar: A mix provides sweetness and adds to the fudgy texture (brown sugar contributes moisture).
- Eggs: Structure and richness.
- Vanilla Extract: Essential for enhancing chocolate flavor.
- All-Purpose Flour: Don't overdo it! Less flour means a fudgier brownie.
- Unsweetened Cocoa Powder: Opt for a good quality Dutch-processed cocoa for a darker color and smoother chocolate flavor. Alternatively, use melted semi-sweet or dark chocolate for an even richer base.
- Pinch of Salt: Balances the sweetness and enhances all flavors.
Crafting the Peppermint Bark Topping
The star of the show, the peppermint bark, requires careful attention to achieve that iconic snappy texture and vibrant mint flavor.
- White Chocolate: This is where quality really matters. Choose good quality white chocolate chips or, even better, a premium white chocolate bar (couverture chocolate) with a high cocoa butter content. Avoid "white candy melts" if you can, as they often contain less cocoa butter and can have a waxy texture, though they are convenient for melting.
- Peppermint Extract: Use pure peppermint extract for the best flavor. Start with a small amount and taste, adding more if desired. Remember, a little goes a long way!
- Crushed Candy Canes: These provide both the characteristic crunch and additional minty flavor, plus that quintessential red and white visual appeal. Placing candy canes in a zip-top bag and crushing them with a rolling pin works perfectly.
Essential Equipment
Having the right tools makes the baking process smoother:
- 9x13-inch Baking Pan: A light-colored metal pan is ideal for even baking.
- Parchment Paper: Crucial for easy removal and clean cuts. Line the pan with an overhang on the sides.
- Mixing Bowls & Whisk/Spatula: For combining ingredients.
- Double Boiler or Microwave-Safe Bowl: For melting chocolate gently.
- Rolling Pin & Zip-Top Bag: For crushing candy canes.
Step-by-Step Guide to Perfect Peppermint Bark Brownies
Now that you have your ingredients and equipment ready, let's assemble these festive delights. Following these steps will ensure your peppermint bark brownies recipe turns out perfectly every time.
1. Prepare the Brownie Layer
- Preheat Oven & Prep Pan: Preheat your oven to 350°F (175°C). Line a 9x13-inch baking pan with parchment paper, leaving an overhang on the long sides to use as handles later. Lightly grease any exposed parts of the pan.
- Melt Butter & Chocolate (if using): In a large, microwave-safe bowl or over a double boiler, melt the butter. If using solid chocolate for your brownie base, melt it with the butter until smooth.
- Combine Wet Ingredients: Whisk in the granulated sugar and brown sugar until fully incorporated. Add the eggs one at a time, mixing well after each addition. Stir in the vanilla extract.
- Add Dry Ingredients: In a separate bowl, whisk together the flour, cocoa powder, and salt. Gradually add the dry ingredients to the wet ingredients, mixing until just combined. Be careful not to overmix; a few streaks of flour are fine.
- Bake: Pour the brownie batter into the prepared pan and spread evenly. Bake for 25-30 minutes, or until a toothpick inserted into the center comes out with moist crumbs attached (not wet batter). This indicates a fudgy brownie.
- Cool Completely: This is arguably the most crucial step! Once baked, remove the brownies from the oven and let them cool completely in the pan on a wire rack. This can take 2-3 hours, or even longer. Do NOT rush this step, or your peppermint bark topping will melt into the warm brownies. For even more expert advice on achieving truly Decadent Peppermint Bark Brownies: Tips & Tricks, we've got you covered.
2. Create the Peppermint Bark Topping
- Melt White Chocolate: Once the brownies are completely cool, melt your good quality white chocolate. You can do this gently in a microwave (heating in 30-second intervals, stirring well each time) or over a double boiler. Melt until smooth and no lumps remain.
- Add Peppermint Extract: Stir the peppermint extract into the melted white chocolate. Start with ¼ teaspoon and taste. Add more if you desire a stronger mint flavor, but be cautious not to add too much, as it can seize the chocolate.
- Spread Over Brownies: Pour the melted peppermint white chocolate over the cooled brownies. Use an offset spatula or the back of a spoon to spread it into an even layer all the way to the edges.
- Crush Candy Canes: While the white chocolate is still wet, sprinkle the crushed candy canes generously over the entire surface. Gently press them down slightly so they adhere to the chocolate.
- Set the Bark: Place the pan in the refrigerator for at least 30-60 minutes, or until the white chocolate layer is completely firm and set.
3. Cut & Serve
- Remove from Pan: Once the bark is firm, use the parchment paper overhang to lift the entire slab of brownies out of the pan and onto a cutting board.
- Slice Cleanly: For clean cuts, use a large, sharp knife. For the best results, heat your knife under hot water, wipe it dry, and then make each cut. Repeat this process for every slice. This helps prevent the chocolate from cracking excessively.
- Serve & Store: Cut into squares or rectangles. These brownies are best served at room temperature or slightly chilled. Store leftover peppermint bark brownies in an airtight container at room temperature for up to 3-4 days, or in the refrigerator for up to a week. For more detailed instructions and alternative takes on this Easy Peppermint Bark Brownies Recipe for Holidays, check out our dedicated guide.
Pro Tips for Elevating Your Peppermint Bark Brownies
- Quality Chocolate Makes a Difference: Invest in good quality chocolate for both your brownies and your bark. It significantly impacts the flavor and texture.
- Don't Skimp on Cooling: We can't stress this enough. Rushing the cooling process of the brownies will result in a messy, melted bark layer. Patience is a virtue here!
- Control Peppermint Intensity: Peppermint extract is potent. Add it gradually to your white chocolate until you reach your desired level of mintiness.
- Get Creative with Crushing: If you don't have candy canes, use other peppermint candies. For extra fine crumbs, use a food processor. For varied texture, crush some finely and leave some larger chunks.
- Perfect Your Cuts: A hot, clean knife is your best friend for making beautiful, neat slices without cracking the bark.
- Make Ahead: Peppermint bark brownies are an excellent make-ahead dessert. You can bake the brownies a day or two in advance, then add the bark topping. They also freeze beautifully for longer storage. Wrap individual slices tightly in plastic wrap, then place them in an airtight container for up to 2-3 months. Thaw at room temperature.
- Garnish for Extra Flair: A light dusting of powdered sugar, a drizzle of melted dark chocolate, or even some edible glitter can add an extra touch of elegance.
There you have it – the ultimate guide to creating perfect peppermint bark brownies that will impress everyone at your holiday gatherings. This peppermint bark brownies recipe is more than just a list of steps; it's an invitation to create a festive, memorable treat that combines the best of rich chocolate and refreshing mint. With a little care and attention to detail, you'll be baking batches of these delightful squares all season long. So gather your ingredients, turn on some holiday tunes, and get ready to spread some serious cheer, one delicious bite at a time!
