Decadent Peppermint Bark Brownies: Tips & Tricks for Holiday Perfection
The holiday season beckons with its promise of warmth, joy, and, most importantly, irresistible treats. Among the most cherished festive desserts, the peppermint bark brownie stands out as a true masterpiece. It’s a delightful fusion of rich, fudgy chocolate and the cool, refreshing crunch of peppermint, creating a symphony of flavors and textures that captures the very essence of holiday indulgence. But achieving that perfect balance, where each layer shines without overpowering the other, requires a few insider secrets. This comprehensive guide will walk you through the essential tips and tricks to master your next
peppermint bark brownies recipe, ensuring your treats are not just good, but truly decadent. For those looking for a quick start, check out our
Easy Peppermint Bark Brownies Recipe for Holidays.
The Foundation: Crafting the Perfect Brownie Base
A truly spectacular peppermint bark brownie begins with an exceptional brownie base. This isn't just a vehicle for the bark; it's an integral component of the overall flavor and texture experience. Skimping here means compromising the whole dessert.
Choosing Your Chocolate Wisely
The type of chocolate you use will significantly impact the depth of flavor in your brownies.
- Unsweetened Chocolate: For intense chocolate flavor and control over sweetness, this is a top choice. You'll add sugar separately.
- Bittersweet or Semi-Sweet Chocolate: These offer a balanced sweetness and bitterness, often leading to a richer, more complex brownie. Use a high-quality brand for superior results.
- Cocoa Powder vs. Melted Chocolate: Many recipes combine both. Cocoa powder provides a deep chocolate flavor and a slightly drier, more intense crumb, while melted chocolate contributes to a fudgier, moister texture. Don't underestimate the power of Dutch-processed cocoa for a darker brownie with a milder chocolate flavor.
Tip: For ultimate decadence, consider using a mix of bittersweet chocolate and a good quality cocoa powder. This combination often yields the most profound chocolate experience.
Achieving Fudgy vs. Cakey Texture
Are you a fan of dense, chewy brownies or light, airy ones? The good news is you can control this aspect of your
peppermint bark brownies recipe.
- For Fudgy Brownies:
- Use more fat (butter or oil) and fewer leavening agents (baking powder/soda).
- Incorporate more melted chocolate than cocoa powder.
- Undercook them slightly – the center should still be a little jiggly when you remove them from the oven. They will continue to set as they cool.
- For Cakey Brownies:
- Increase the flour content slightly.
- Add a bit more baking powder or baking soda.
- Whisk the eggs and sugar longer to incorporate more air, creating a lighter crumb.
For peppermint bark brownies, a fudgy base is generally preferred as it provides a wonderful contrast to the crisp, snappy bark.
Don't Overmix!
This is perhaps the most crucial rule for any brownie recipe. Once you've added the dry ingredients to the wet, mix *just until combined*. Overmixing develops the gluten in the flour, leading to a tough, dry, and chewy brownie rather than a tender, fudgy one. A few streaks of flour are perfectly fine; they'll disappear during baking.
Elevating the Peppermint Bark Layer
The peppermint bark is the star of this holiday treat, providing that iconic flavor and festive appearance. Getting this layer right is key to a truly decadent experience.
The Art of Melting Chocolate
Melting chocolate can be tricky, but with a few pointers, you'll achieve silky smooth results every time.
- Double Boiler Method: This is the safest way. Place chopped chocolate in a heatproof bowl over a saucepan of simmering water (ensure the bowl doesn't touch the water). Stir gently until melted and smooth.
- Microwave Method: Use this with caution. Heat in 20-30 second intervals, stirring thoroughly after each interval. Chocolate retains its shape even when melted, so don't just rely on appearance. Overheating will cause it to seize and become grainy.
- Quality White Chocolate: For the bark, invest in good quality white chocolate chips or bars. Compound chocolate (often labeled "white confectionery coating") can work, but true white chocolate made with cocoa butter will yield a much smoother, more luxurious texture and better flavor.
Tip: Always start with completely dry equipment. Even a single drop of water can cause chocolate to seize, turning it clumpy and unusable.
Peppermint Perfection: Extract vs. Candy
The peppermint flavor comes from two main sources, and balancing them is crucial.
- Peppermint Extract: A little goes a long way! Add it to your melted white chocolate for an even peppermint flavor throughout the bark. Start with a small amount (e.g., 1/4 to 1/2 teaspoon per 8-10 oz chocolate) and taste. It's easier to add more than to fix an overpowering mint flavor.
- Crushed Candy Canes: These provide the festive crunch and visual appeal. Make sure they are finely crushed but still have some larger pieces for texture. Add them to the melted white chocolate after the extract, reserving some for sprinkling on top.
Fact: The oil in peppermint extract can sometimes thin melted chocolate. If this happens, a tiny bit of melted coconut oil or vegetable shortening (1/2 teaspoon per cup of chocolate) can help restore its smooth consistency.
Layering Techniques for Success
Proper layering ensures a clean, distinct separation between the brownie and bark.
- Cool Brownies Completely: This is non-negotiable! Warm brownies will melt the white chocolate, creating a messy, integrated layer instead of a clean, defined bark. Place your baked brownies in the refrigerator or freezer for at least an hour, or until completely chilled, before adding the bark.
- Even Spread: Pour the melted peppermint bark mixture over the *completely cooled* brownies. Use an offset spatula to spread it quickly and evenly to the edges. Work swiftly, as the bark will begin to set.
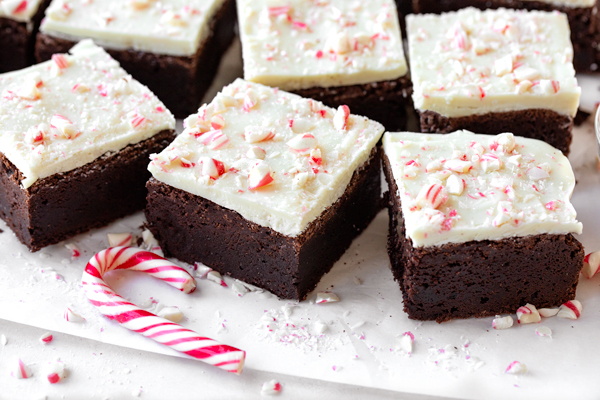
- Festive Topping: Immediately after spreading the bark, sprinkle your reserved crushed candy canes generously over the top. This not only adds visual appeal but also extra peppermint crunch.
- Chill to Set: Return the brownies to the refrigerator for at least 30-60 minutes, or until the bark is firm and snaps cleanly when broken.
Troubleshooting & Advanced Tips for Your Peppermint Bark Brownies Recipe
Even with the best recipes, sometimes things go awry. Here’s how to troubleshoot common issues and elevate your brownie game. For more detailed perfection tips, consider reading our article on
How to Make Perfect Peppermint Bark Brownies.
Avoiding a Soggy Bark Layer
The most common complaint is a bark layer that separates or becomes soggy.
- Ensure Brownies are Cold: As mentioned, this is paramount. The cold brownie surface helps the chocolate set quickly and prevents melting.
- Proper Storage: Store the finished brownies in an airtight container at room temperature for up to 3 days, or in the refrigerator for up to a week. Humidity is the enemy of crisp bark.
- Watch for Moisture: Candy canes can attract moisture. If you live in a very humid environment, you might consider adding the crushed candy canes closer to serving time or storing them separately until ready to sprinkle.
Cutting Clean Slices
Beautiful brownies deserve clean, sharp edges.
- Chill Thoroughly: Ensure the brownies are very cold from the refrigerator. This hardens both the brownie and the bark, making them easier to cut cleanly.
- Hot Knife Technique: Run a sharp, thin knife under hot water for a few seconds, wipe it dry, then make a single cut. Reheat and wipe the knife before each subsequent cut. This prevents sticking and creates perfectly smooth edges.
- Score First: For perfectly uniform pieces, lightly score the top of the bark before cutting all the way through.
Storage and Shelf Life
Proper storage will keep your
peppermint bark brownies recipe creations fresh and delicious.
- Airtight Container: Always store in an airtight container to prevent drying out and to protect the bark from humidity.
- Room Temperature: If your home is cool (below 70°F/21°C), they can be stored at room temperature for 2-3 days.
- Refrigeration: For longer storage, or if your home is warm, refrigerate for up to a week. Allow them to come closer to room temperature before serving for the best texture.
- Freezing: Peppermint bark brownies freeze beautifully! Cut into individual squares, wrap tightly in plastic wrap, then place in a freezer-safe bag or container for up to 2-3 months. Thaw at room temperature.
Gifting and Presentation
These brownies make fantastic gifts!
- Festive Packaging: Layer them in decorative tins, treat boxes, or cello bags tied with festive ribbon.
- Layering with Parchment: Place a small square of parchment paper between each brownie to prevent sticking, especially if stacking.
- Add a Tag: Include a small handmade tag wishing a happy holiday and perhaps noting any special ingredients.
Variations and Customizations
While the classic
peppermint bark brownies recipe is perfect, don't shy away from personalizing it!
- Dark Chocolate Bark: For a more intense chocolate experience, use dark chocolate instead of white chocolate for the bark layer. This creates a striking visual contrast.
- Swirled Bark: Instead of a solid white bark, swirl a little melted dark chocolate into the white chocolate with a skewer before it sets for a marbled effect.
- Different Crushed Candies: While candy canes are traditional, consider using crushed peppermints, Andes mints, or even a mix of holiday-themed sprinkles for a unique touch.
- Add Extracts: A touch of almond extract in the brownie batter, or a tiny amount of vanilla bean paste in the white chocolate bark, can add subtle layers of flavor.
- Salted Caramel Drizzle: For an extra layer of decadence, add a fine drizzle of homemade or store-bought salted caramel over the top before the bark sets (or after, for a contrasting texture).
Conclusion
Creating truly decadent peppermint bark brownies is an achievable goal for any home baker. By paying close attention to the quality of your ingredients, understanding the nuances of chocolate, and applying these simple yet effective tips and tricks, you’ll transform a simple treat into a show-stopping holiday dessert. From crafting the perfect fudgy brownie base to mastering the crisp, refreshing peppermint bark, every step contributes to an unforgettable culinary experience. So, gather your ingredients, embrace the festive spirit, and get ready to impress your friends and family with the most exquisite
peppermint bark brownies recipe they've ever tasted. Happy baking and happy holidays!